
In this series, we’re going to learn how to create a simple export message with Electronic Reporting (ER) from scratch, without extending any generic message from Microsoft. The goal is to generate a txt file containing filtered data from customer invoices.
There are three kinds of nodes or steps involved in creating an export message:
The Model: This is an intermediary node used by the mapping to transfer data and by the format to receive the data.
The Mapping: We use the mapping to retrieve the necessary data from tables and other objects.
The Format: This is responsible for displaying the data in the required scheme and format (Excel, Word, CSV, txt, JSON, etc.).
The model has a tree structure, and its scheme doesn’t necessarily reflect the database structure or the desired output format but represents an organized way to arrange the data. For example, if we need an address, we might group the address, the county code, the county name, the country ISO 2 code, the country ISO 3 code, and the country name in the same container. This organization might be different from how data is stored in the database or presented in the final format. The main reasons for working this way include the ability to feed multiple formats with completely different structures from the same model and to simplify the process for users creating or extending the format, making it easier to work with an abstract structure than one that mimics database relations directly.
Before starting with the model, we must go to the Electronic Reporting workspace and ensure our own configuration provider is active. If we don’t have one, we must create it under ‘Configuration providers‘.
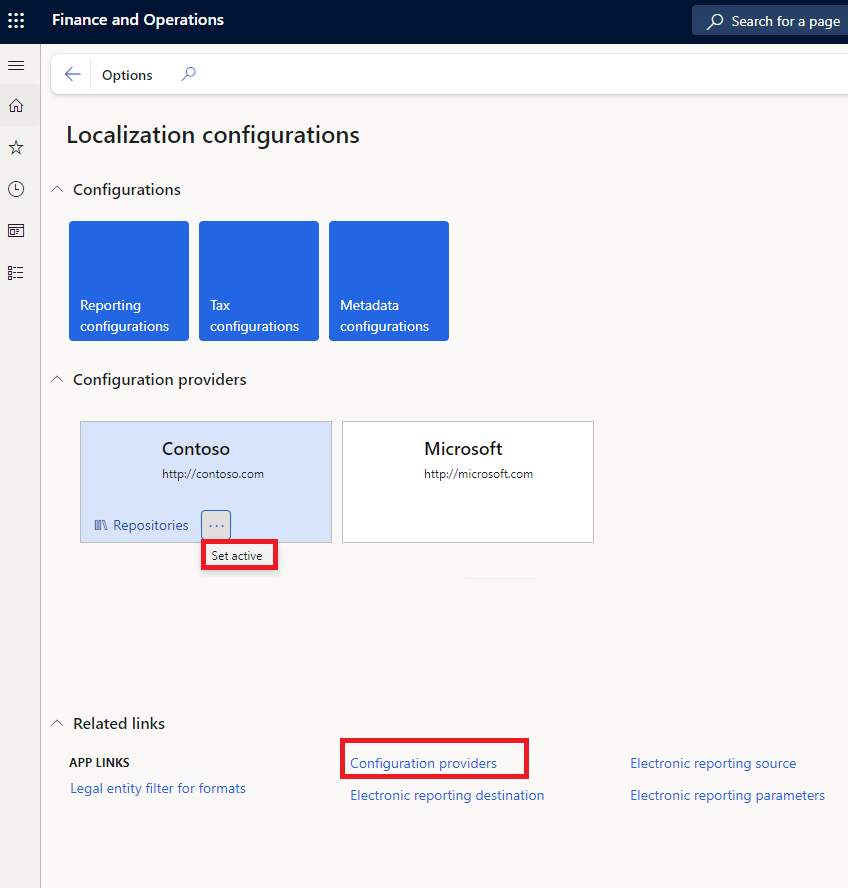
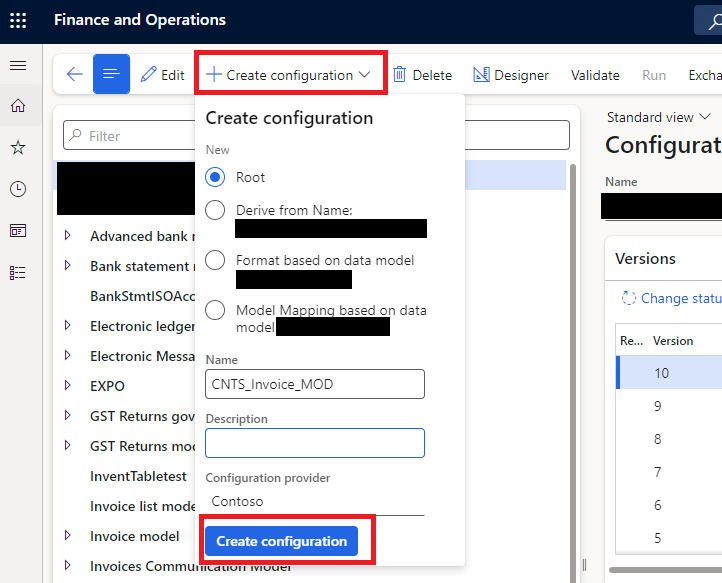
Next, navigate to ‘Reporting Configurations‘ located in the top left corner. Click on ‘+ Create configuration‘, select ‘Root‘, then assign a name to our model and provide an optional description.
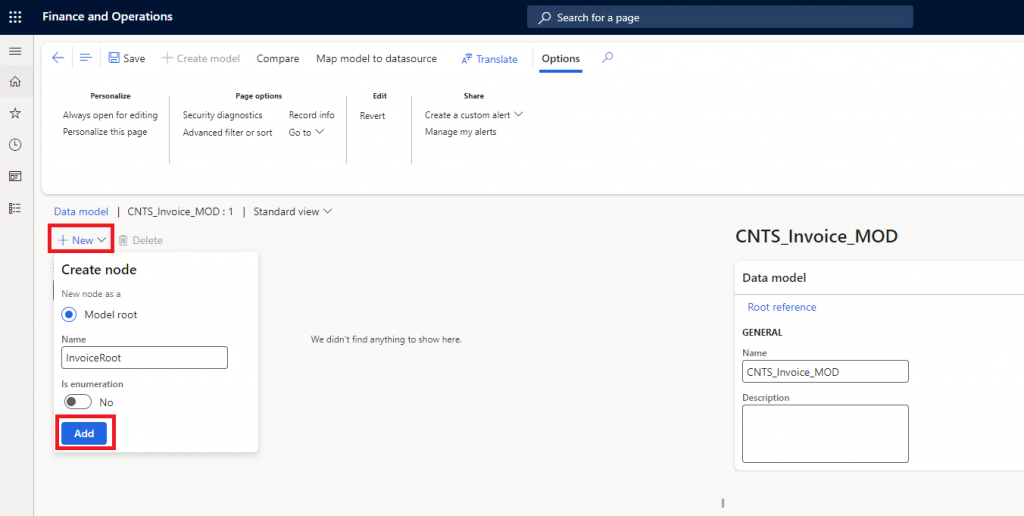
Next, select the model we’ve created from the left column and click the ‘Designer‘ button at the top. This will open the UI for designing the model. We’ll begin by creating the model root. Although Microsoft Models often have more than one root, I prefer simplicity and usually create only one. If a callback (a more advanced pattern) is needed, I might create two.
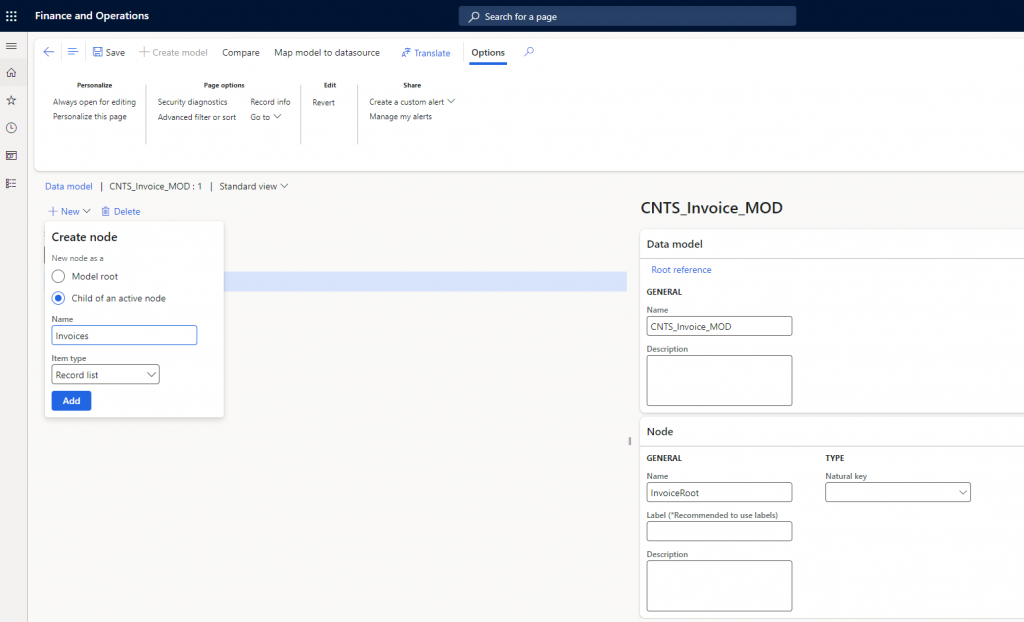
Under the Root, we’ll begin building the tree structure by adding a ‘Record list‘ node to hold the list of invoices. If we were focusing on a single invoice, we would instead use a ‘Record‘ node.
We continue developing the tree structure, assigning the correct datatype to each element:
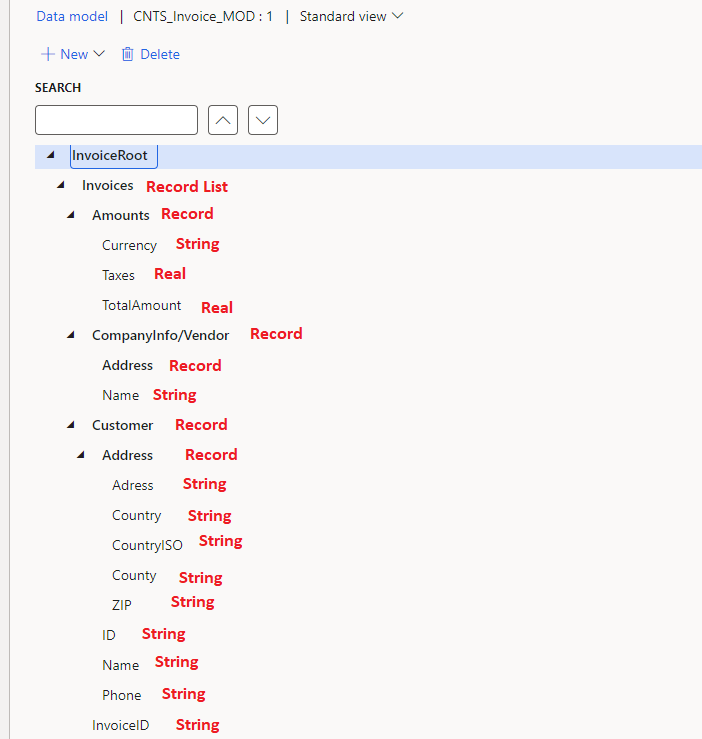
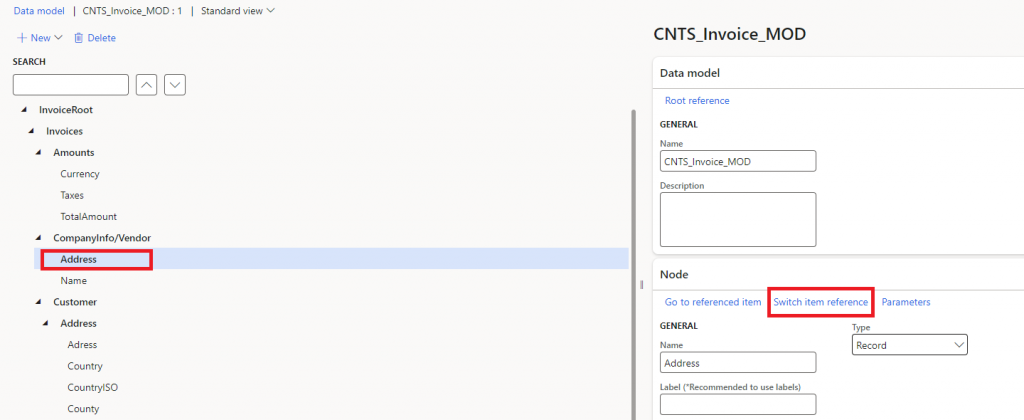
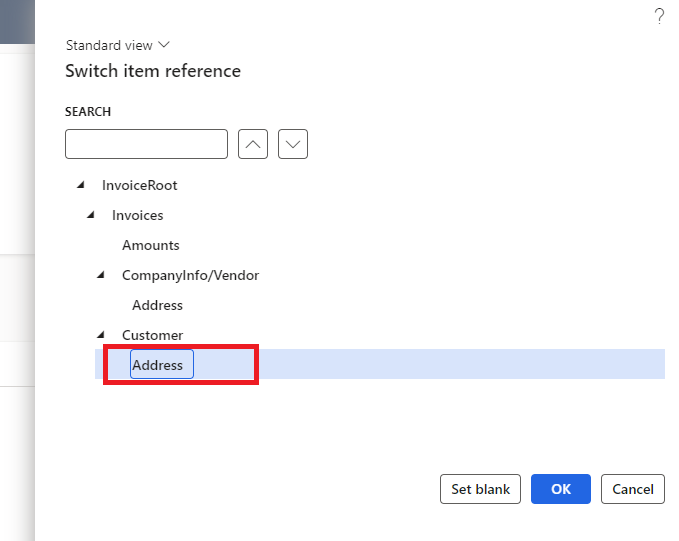
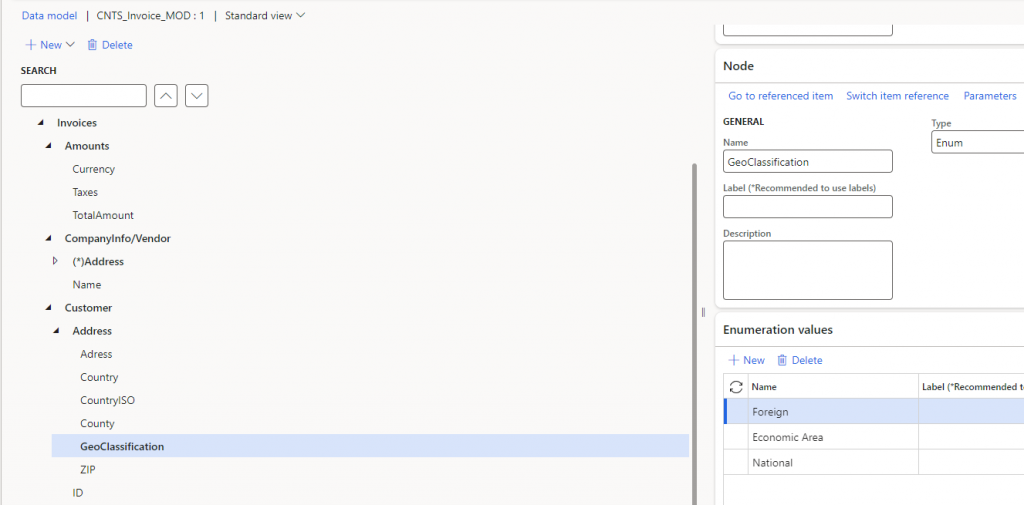
Some records, such as Vendor and Customer Address, may share the same structure even though they reside under different nodes. To avoid duplicating effort by creating the same fields twice, we can link one to the other. This way, any addition or deletion of a field in the Customer Address will automatically be reflected in the Vendor Address. To achieve this, select the Vendor Address node, choose ‘Switch item reference,’ and then select Customer Address
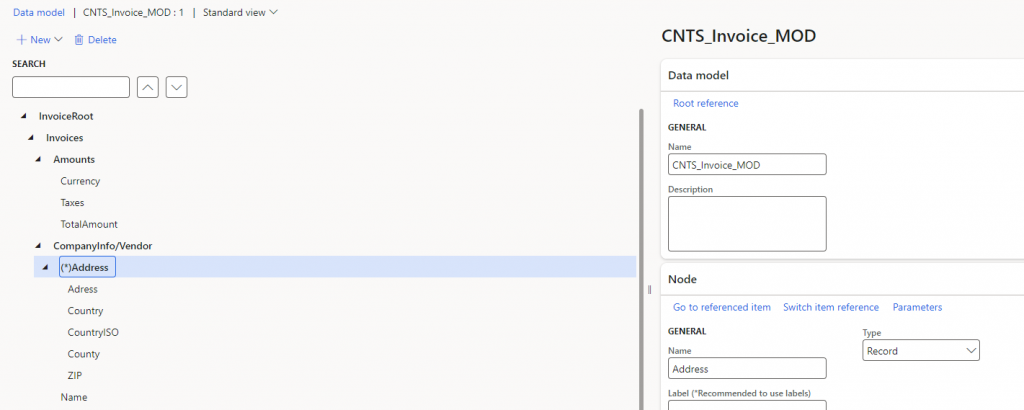
When a node references another, an asterisk will appear. To add a field to a referenced node, we cannot do it directly. Instead, we select ‘Go to referenced Item‘ on the right. It’s also perfectly acceptable to have referenced fields that may not contain data in one of the nodes.
Finally, we will create a model enum data type within the address node to specify the type of address: whether it’s a national address, a foreign address from the same economic area (e.g., EU, NAFTA, BRICS), or a foreign address from outside these areas.
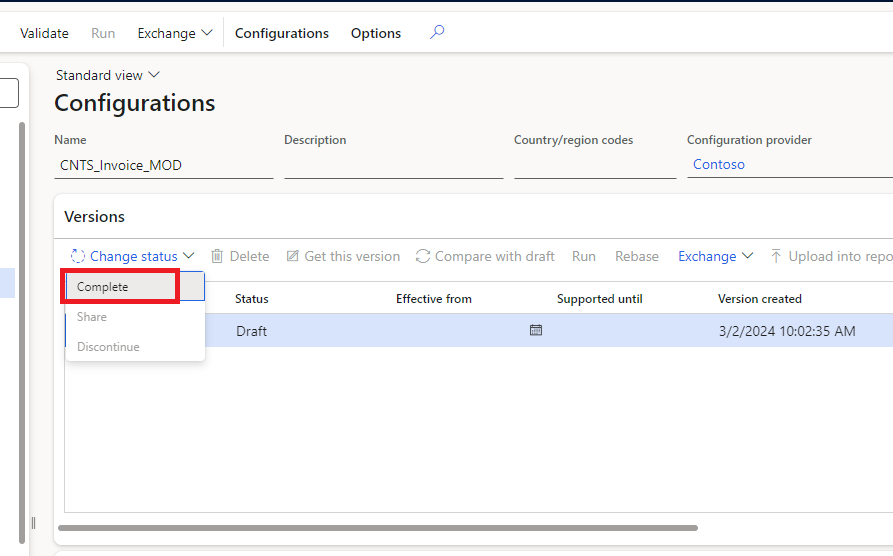
Now, we can save and close the model. The version will be marked as completed (v.1), and a new draft version (v.2) will be created, allowing further editing.
The model is now complete, but a draft version remains open for future modifications. Once a mapping or format is created, it’s best to only extend it rather than deleting fields. Deleting fields could potentially disrupt messages if the referenced node is not found. As a precaution, instead of deleting fields, I typically label them as ‘Legacy‘ without changing the node name.
Leave a Reply