
In this second part, we’re going to see how to create the mapping. This is the most technical part, and while we’re going to keep it simple, it sometimes requires knowledge of the system architecture and access to Visual Studio, or the help of someone with a technical profile. I’ve decided to split the mapping explanation into two posts because it’s quite detailed. So, this series will now have four parts.
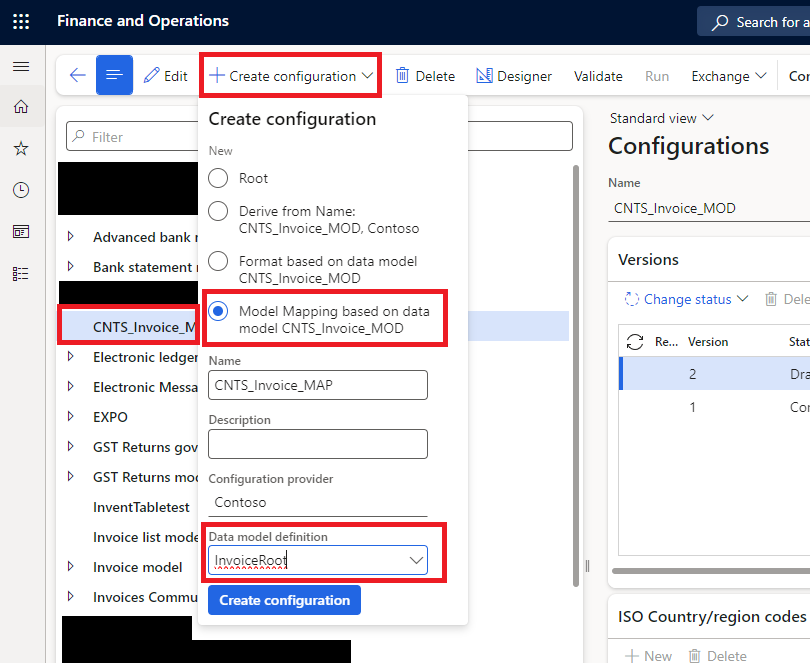
Let’s start by selecting our model. Click ‘+Create configuration’, give it a name, and because in our case there is only one model definition or root, we select the only one available in the lookup. Finally, click ‘Create configuration’.
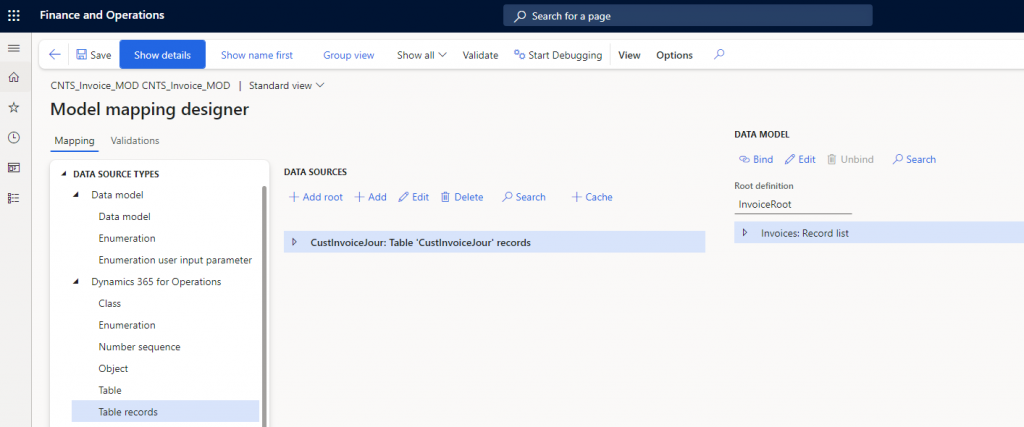
Now, selecting our new mapping, we click on ‘Designer’ in the top menu, and a new form opens with the mappings. We should already have one mapping created with direction to model, which means it is an export mapping. By clicking on ‘Designer’ again, a new form will open:
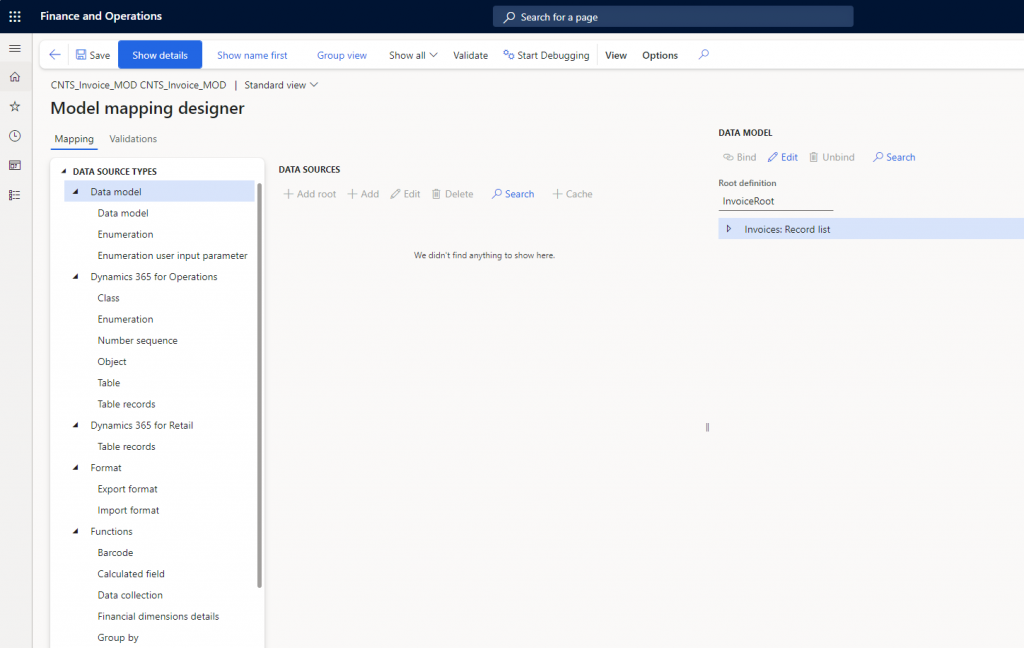
In the left column, we have most of the AOT objects, along with some ER objects. When these objects are declared, they will appear in the middle column. There, they will be transformed and finally linked with our model in the right column.
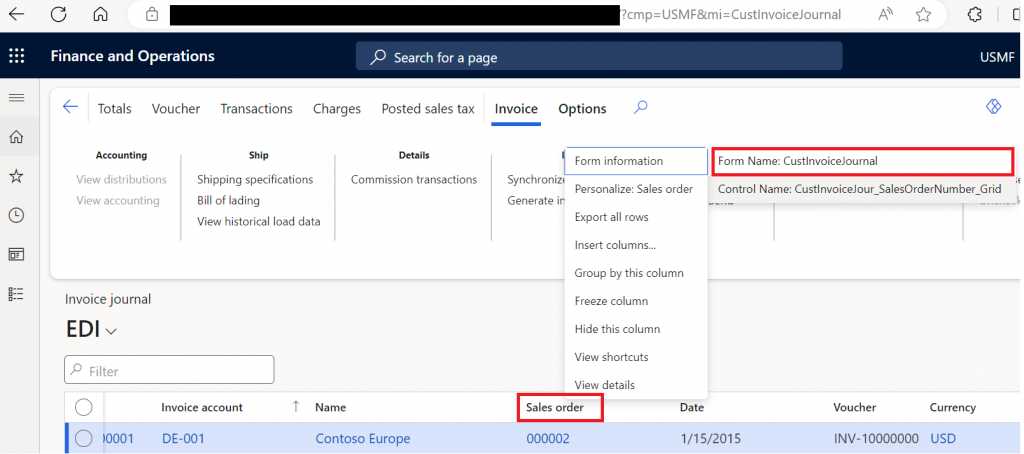
Let’s start by declaring the table that contains the invoice information. If we don’t know the name, we simply open the customer invoices form, right-click a field, select ‘Form information’, and then ‘Form name’.
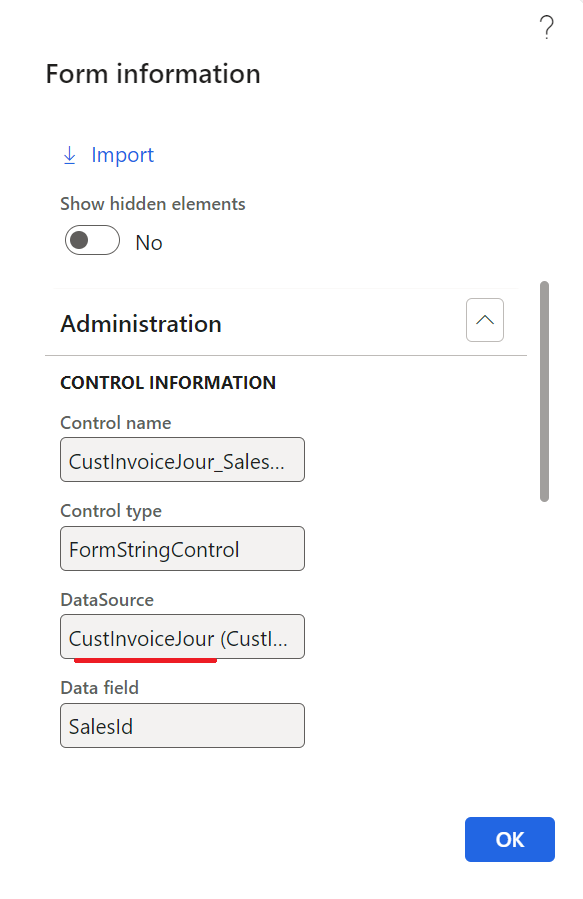
Now, let’s declare ‘CustInvoiceJour’. In the left column, under ‘Dynamics 365 for Operations’, find ‘Table records’ (ensure you are not looking under ‘Retail’). ‘Table’ contains the static methods of the table. We would use this one if we already had the record keys or needed a specific function from that table. Therefore, we are going to select ‘Table records’. In the middle column, click ‘+ Add root’ and fill in the form with the following data:
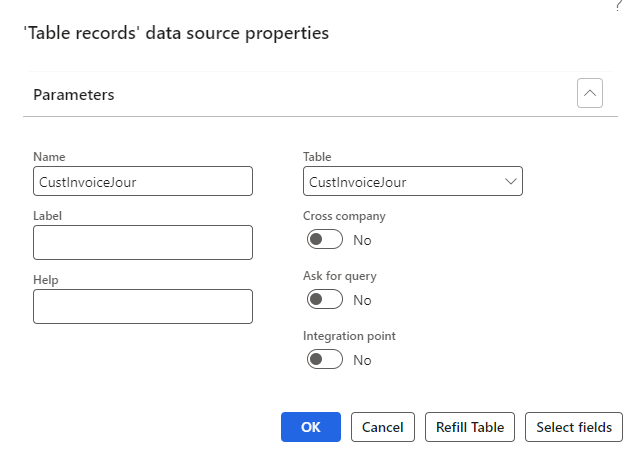
‘Name’ refers to the name of the declared object. I usually give it the same name as the object itself, but if it’s static, I add the suffix ‘ST’. This is because in some complex mappings, we might use both the table and table records. ‘Table’ is the system name of the table we’re declaring. ‘Cross company’ allows us to get records from all legal entities. ‘Ask for query’ enables the user who executes the record to filter the table. Regarding ‘Integration Point’, I’m not sure if it’s really used for export messages, but it’s probably for cases when we have more than one mapping and we want to decide by code which mapping should run.
We should have:
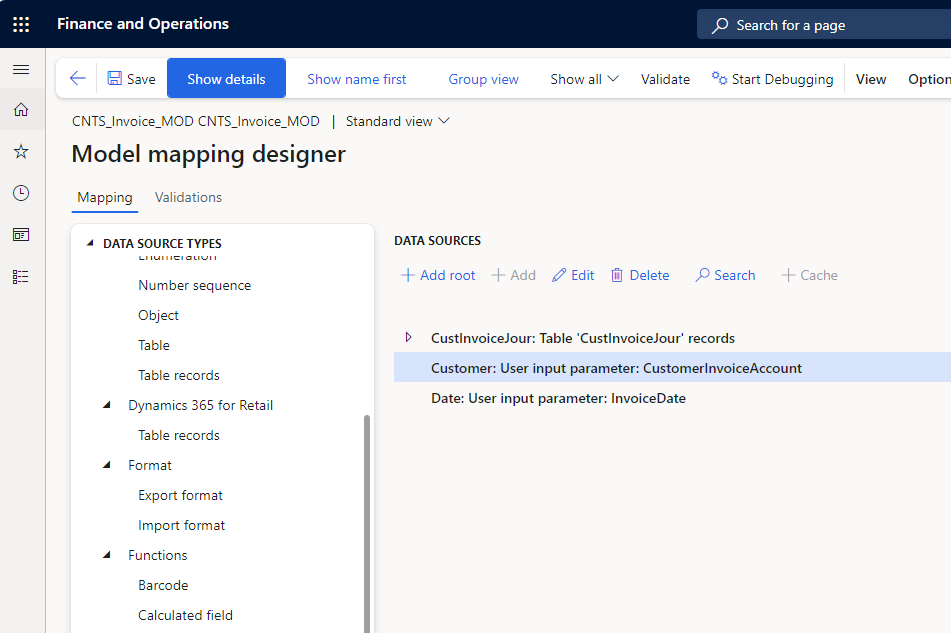
Now, we’ll provide the option for the user executing this mapping to filter records by date and customer. On the left, you’ll find ‘User Input Parameter’. Once declared and linked, it will allow either the user or the programmer to select specific data when the mapping is executed. Let’s declare one parameter for the customer and another for the date:
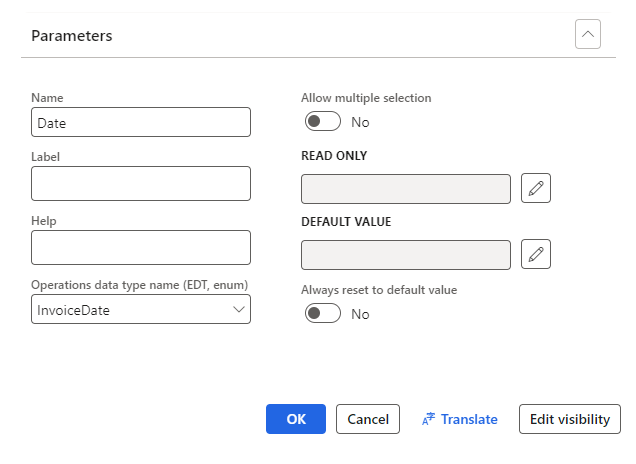
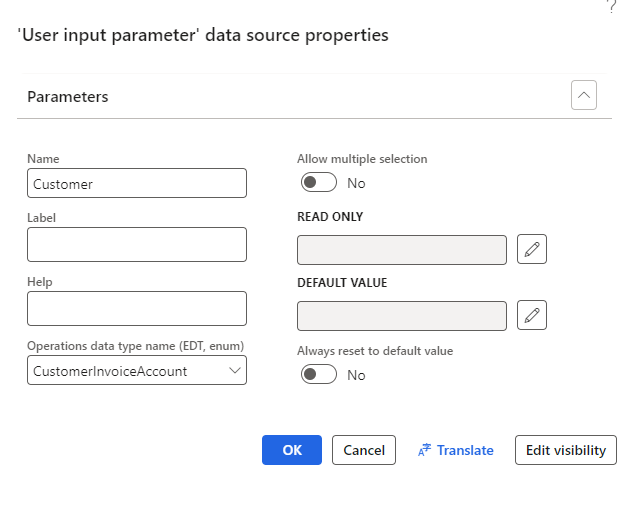
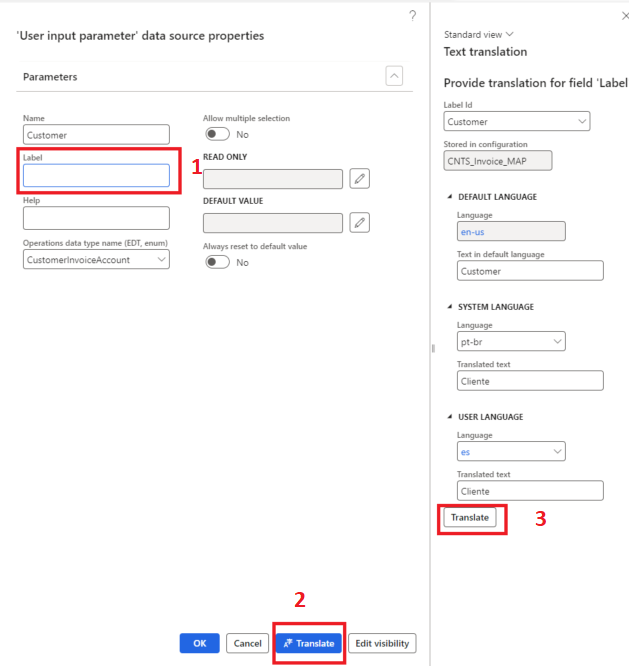
The only complex part is selecting the right EDT or Enum. For the date, it doesn’t really matter; any date will work. For the customer, most strings would work, but if we leave the default one, ‘Description’, no lookup will open to select the right customer; instead, we’ll have a text field. If we don’t have access to Visual Studio, the best way to find the correct one is to use filters and trial and error.
It’s also good practice to use the ‘Label’ field if our development needs to be used by the final user:
Now we should have:
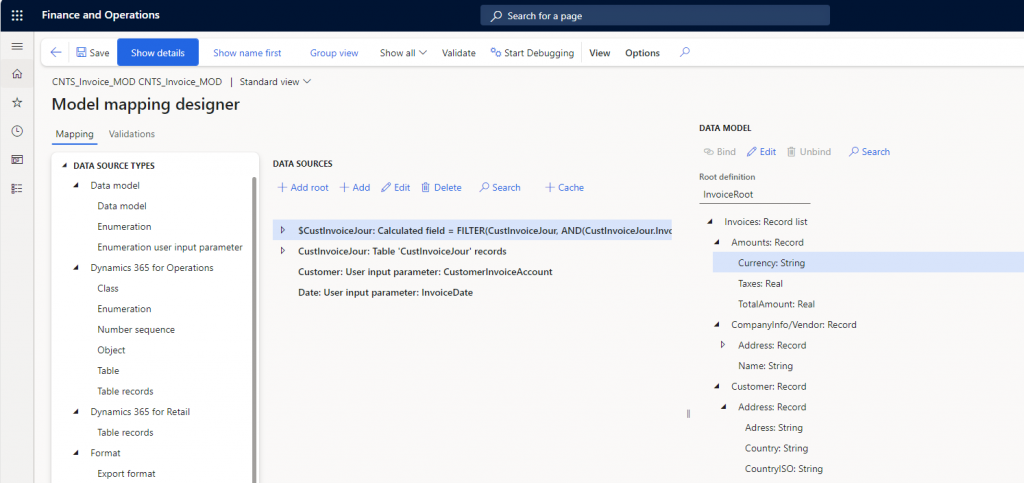
Let’s filter the ‘CustInvoiceJour’. For this, we select ‘Calculated Field’ on the left, then ‘+Add root’. I usually follow Microsoft’s naming convention, using the same table name but adding a $ sign prefix to indicate it’s a transformation ($CustInvoiceJour). Next, let’s click to ‘edit the formula’.
In this new form, on the left, we have the objects; in the middle, the formula; and on the right, the ER functions. If we expand the ‘CustInvoiceJour’ node on the left, we can see this node has relations to other tables, the fields of this table—like the ones we’re going to use to filter (Invoice Account and Invoice Date). It also has dynamic methods, for example, ‘SalesTable()’ which returns the Sales order record.
Let’s add the formula:
FILTER
(
    CustInvoiceJour,
    AND
    (
        CustInvoiceJour.InvoiceAccount = Customer,
        CustInvoiceJour.InvoiceDate = Date
    )
)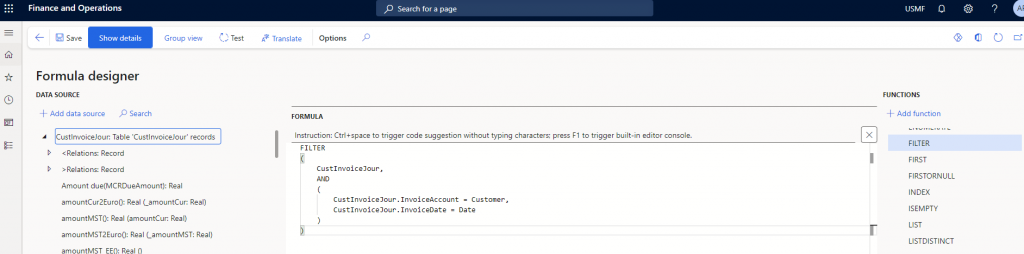
This formula begins with a ‘FILTER’. We can either write it directly or locate it in the right column along with its explanation. The Filter function requires two parameters: the List we want to filter (CustInvoiceJour on the left column) and the condition. Since we have two conditions, we’ll also use the ‘AND’ function, which accepts between 2 to n boolean parameters. In each parameter of the ‘AND’, we compare one field of the table with one of the user input parameters, the formula will filter those records where both conditions are true (the same).
After configuring the formula, we can save and close. Back on the main form, we should now have:
WHERE vs FILTER
For filtering, we usually have the choice between ‘FILTER’ and ‘WHERE’. ‘FILTER’ translates directly into an SQL statement, whereas ‘WHERE’ operates in memory. Using ‘WHERE’ to filter all invoices in the system could significantly slow down our report execution, especially as real-world data accumulates, eventually rendering the report unusable in a production environment. However, ‘FILTER’ comes with its limitations; for instance, it cannot be applied to lists that have been modified, such as by adding a calculated field, or filtering based on related tables or methods. Thus, ‘FILTER’ is best used for filtering table records or list where only SQL statements are applicable. For example, we could divide our previous formula into two steps and still use ‘FILTER’ on both:
$CustInvoiceJour
FILTER
(
    CustInvoiceJour, //This are table records
    CustInvoiceJour.InvoiceAccount = Customer
)
$CustInvoiceJour2
FILTER
(
    '$CustInvoiceJour', //This is a calculated field that's entirely translatable into SQL because it exclusively utilizes 'FILTER'
    '$CustInvoiceJour'.InvoiceDate = Date
)
Because of this, we should always begin with ‘FILTER’ and then, if we encounter a situation where filtering cannot be translated to SQL, switch to ‘WHERE’ on a new calculated field. This way, we only work with a portion of the table in memory, not the entire dataset. If we get it wrong the system will warn us that either a ‘FILTER’ cannot be used or that a ‘FILTER’ will be more efficient than a ‘WHERE’.
Leave a Reply