
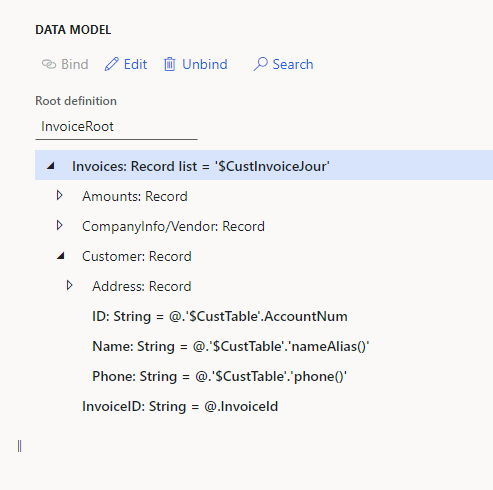
In this final part of the mapping, we’re going to link our declared and transformed objects with the model and then check if the data we are getting is what we were expecting.
There are two ways to link nodes: either directly with the ‘Bind’ button or using the formula UI ‘edit’. Let’s start with the filtered list of invoices:
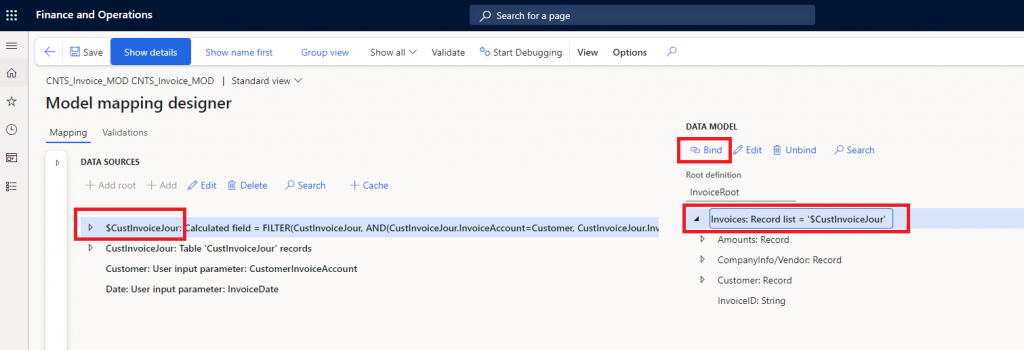
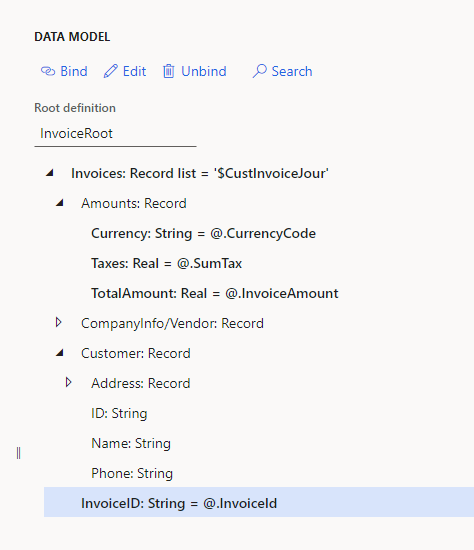
Now, we can open ‘$CustInvoiceJour’ and find each field or method we need from that table. Because the fields will be under the model record list ‘Invoices’, they’ll be preceded with an ‘@’ after binding them.
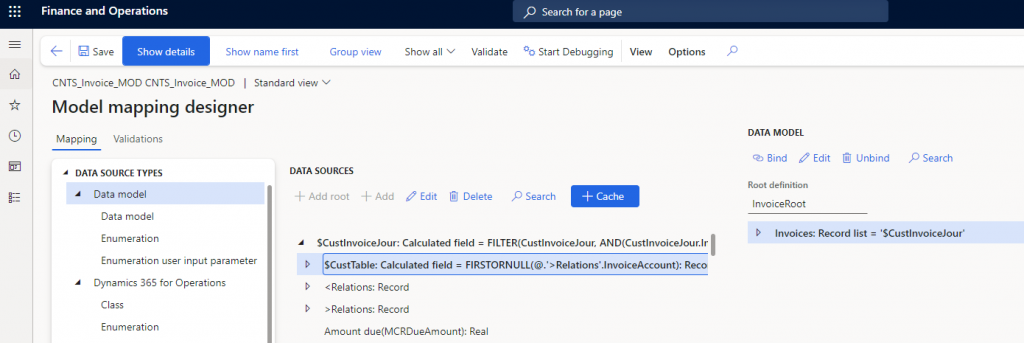
On the CustInvoiceJour table, not all the fields we need are present, but we can use the relations to navigate to the required table. In ‘<Relations’, we typically find lines/transactions (1:n), and in ‘>Relations’, headers (n:1) and one-to-one relationships (1:1) are found.
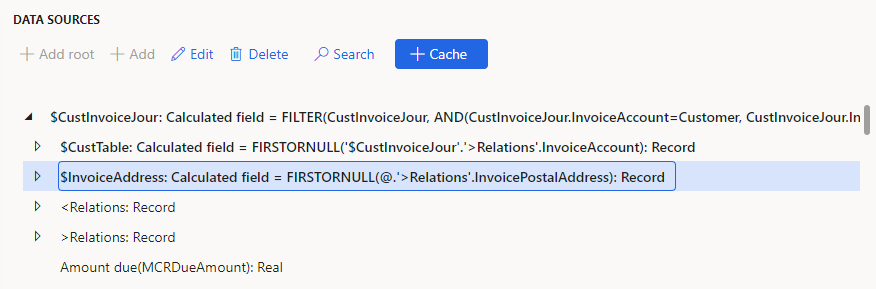
If we open ‘>Relations’ on the ‘$CustInvoiceJour’, we find the following nodes:

The relations are named not by the tables they are related to but by the relation names given in the table relations (by code), making it a bit difficult. That’s why we should look at the bottom, where the relation is explained. We have 4 relations to the ‘CustTable’, two of them using the ‘OrderAccount’ and the other two the ‘InvoiceAccount’ field. We are going to use the one that uses the ‘InvoiceAccount’. While this relation is marked as ‘Record list’, in reality, it is a record because there is only one ‘InvoiceAccount’ per invoice. In this case, the ER won’t give us any warning if we use the record list as a record, but for good practice, let’s just transform it to a record by creating a new calculated field on the ‘$CustInvoiceJour’:
We can even cache this record, so each time we call it, it won’t make a new SQL request:
Now, we can use the fields from the CustTable:
For the Address, we can use the node under ‘>Relation’ ‘Addresses(InvoicePostalAddress)’:
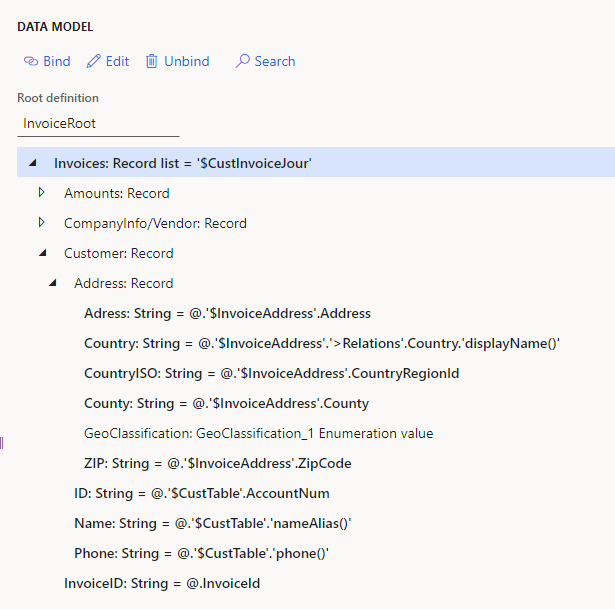
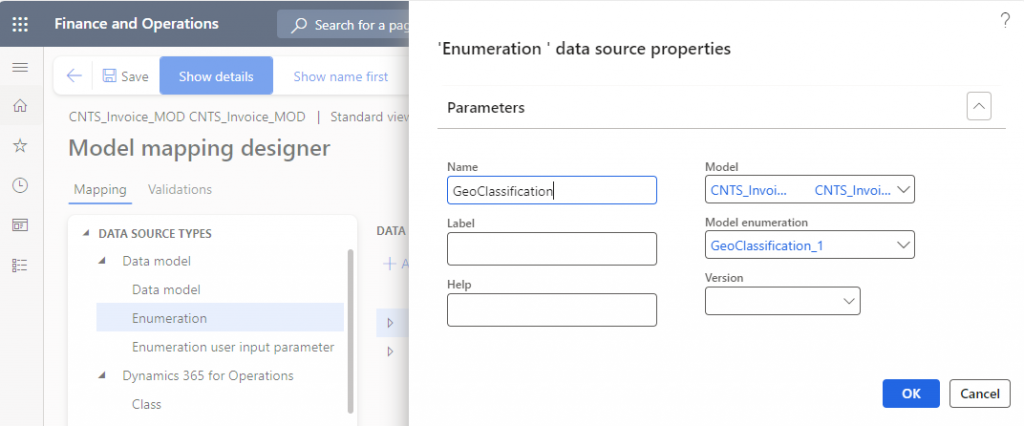
Now, let’s get the ‘GeoClassification’. First, let’s declare our model enumeration at the root:
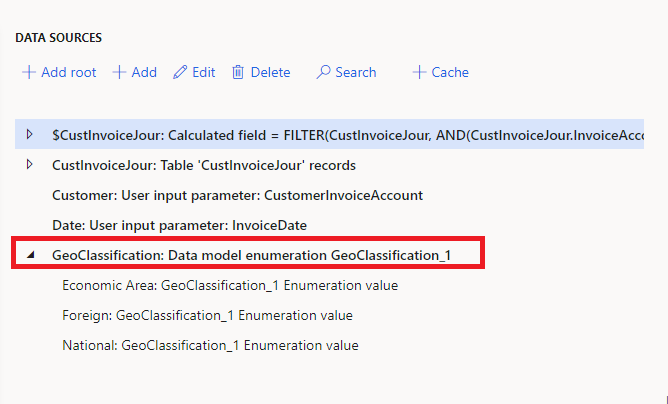
And find the field that indicates if our country is in the same economic area:
$InvoiceAddress / >Relations: Record / Country/region(Country) / Record list > / ‘Member of Customs Union(MemberOfCustomsUnion_RU): NoYes Enumeration value’.
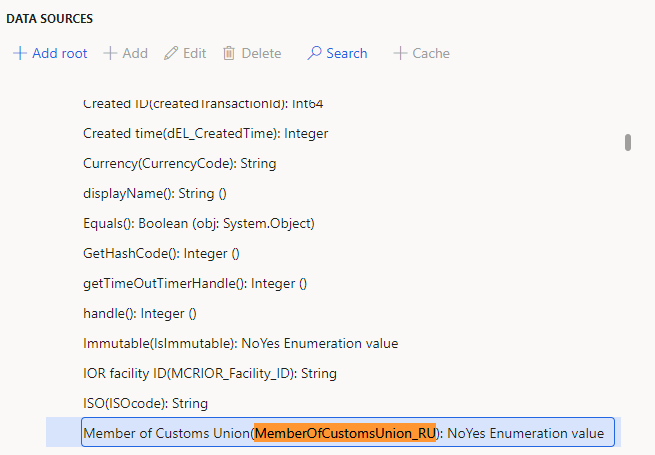
Regarding this field, it is a NoYes enumeration, so we’ll have to declare it. It also has the suffix RU, indicating it was possibly created initially just for Russia, but it seems now it can be used globally as we can find it in the UI. Functionally, I’m not sure when this field is really used, but I suppose it might be checked between EU countries, perhaps only for Puerto Rico in the USA, and for Belarus and Kazakhstan in Russia.
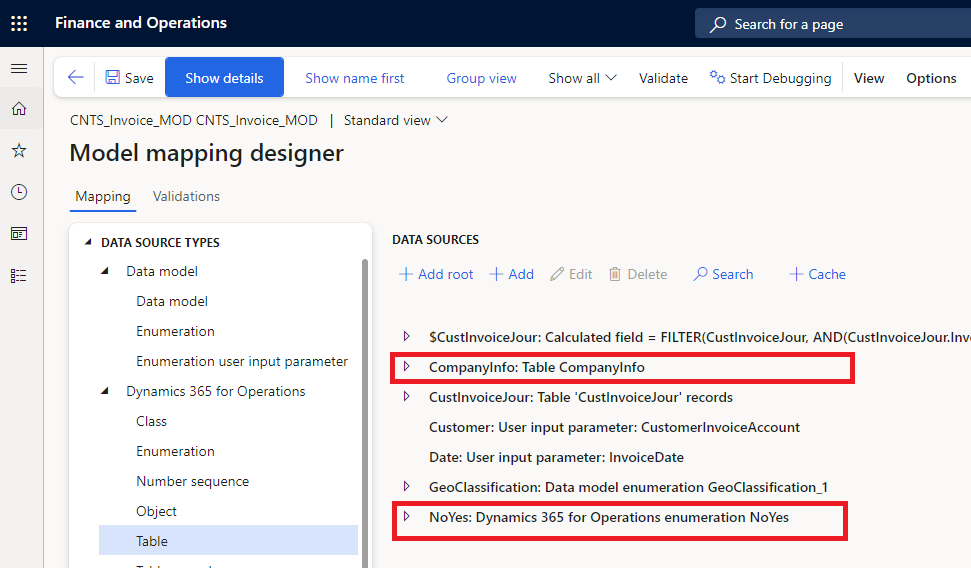
Let’s then declare the ‘NoYes’ enum and the static table ‘CompanyInfo’, from which we’ll get our country. This table has the static method ‘find’, which is used in most tables and returns a record based on the keys passed to it as a parameter. In the case of ‘CompanyInfo’, it doesn’t have mandatory parameters; we can either pass a legal entity acronym or nothing. If nothing, it will return the record of our current company.
And add the formula to the data model:
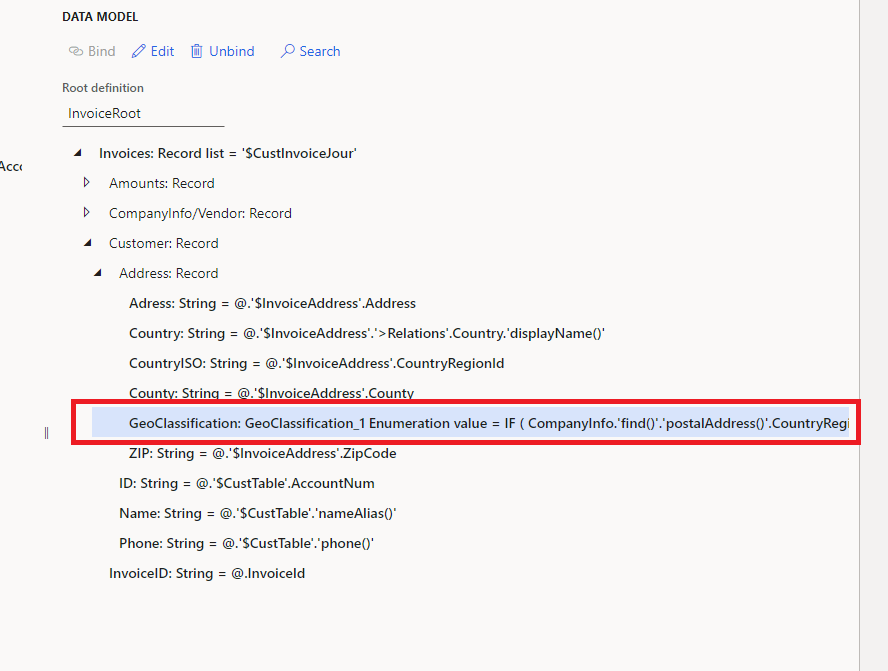
IF
(
    CompanyInfo.'find()'.'postalAddress()'.CountryRegionId = '$CustInvoiceJour'.'$InvoiceAddress'.CountryRegionId,
    GeoClassification.National,
    IF
    (
        '$CustInvoiceJour'.'$InvoiceAddress'.'>Relations'.Country.MemberOfCustomsUnion_RU = NOYES.YES,
        GeoClassification.'Economic Area',
        GeoClassification.Foreign
    )
)
In this formula, we use the function ‘IF’, which has 3 parameters: a boolean, if true returns the second parameter, and if false the third. We look at the method ‘postalAddress()’ from our current legal entity, which returns the primary address. We then compare it with the customer’s invoice address. If they have the same country, we return the enum value ‘National’. If not, we use another ‘IF’ to check if the customer’s country is inside our customs union. If yes, we return ‘Economic Area’; if not, ‘Foreign’:
Finally, let’s get our CompanyInfo data for the branch ‘CompanyInfo:

Now we can save, go back to the previous page with the top button ‘<-‘ and ‘Run’ the mapping. If we provide the system parameters of a real invoice (the customer and the date), it will return us an XML with 1 to n invoices with the data we wanted.

Great, we can close the mapping and complete it.
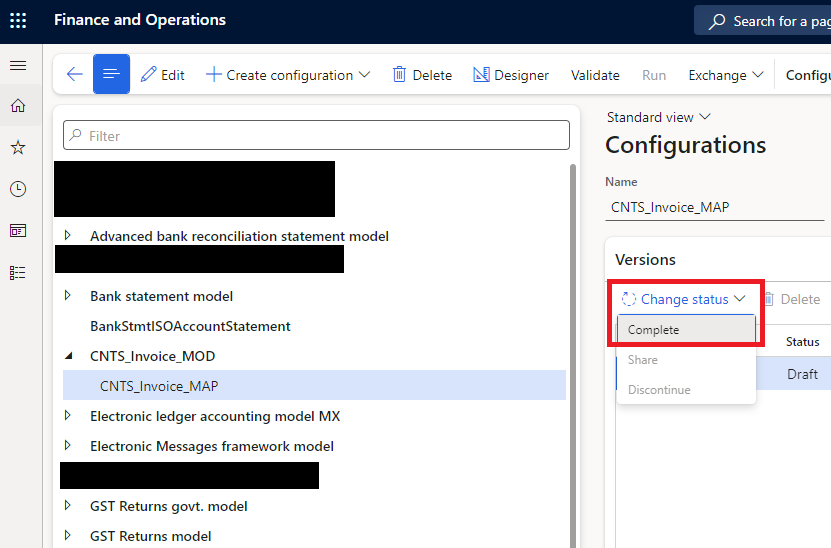
A small mistake!
So, during the mapping, I’ve realized that we are printing n invoices, and on each invoice, we have the same data for our address. That’s inefficient, and we should fix it if this report is to be put into production. Adding fields to a model is easy, but changing the whole branch is needed. I’m going to continue the series without fixing it but will explain the steps I would take.
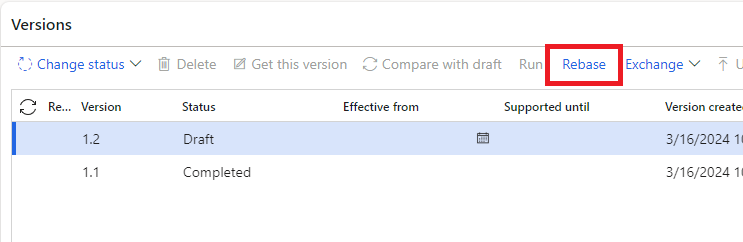
First, unlink all records from the node ‘CompanyInfo/Vendor’ on the mapping, possibly saving the formula in a txt file for easy recreation. It’s important to delete data from the mapping first; otherwise, we’ll get an error when deleting the fields on the model. Secondly, recreate the branch ‘CompanyInfo/Vendor’ under the root on the model and delete the original under invoices. Complete the model, rebase the mapping so it points to the new model version, and link again the ‘CompanyInfo’ data to the new ‘CompanyInfo/Vendor’ branch.
Leave a Reply